header

Thursday, April 23, 2015

Star Gazer Quilt

Those of you who read here regularly will recognize this color scheme! :) This quilt is a commission, so I provided a menu of options and made this quilt based on the customer's preferences. This is my farthest traveling quilt; my husband hand-delivered it to Trinidad last week!


The pattern is Star Gazer by Lunden Designs. I really like how the pattern continues off the left and right edges! The instructions are really easy to follow and the resulting quilt is so pretty. The Orange Peel is not the most forgiving quilt block, so for beginners I would recommend practicing with a few blocks before cutting fabric for the whole quilt. I only sewed one test block to give myself confidence to pursue this pattern, but I wish I would have sewn a few more so I could see how they all fit together. Sewing these curves was not hard at all and any problems I had were solely because of some slight cutting inaccuracies.
  • Accurate template cutting is essential! The legs of the star need to be perfect. I accidentally cut two of the legs a little small. The measurement difference is slight, but it is noticeable on the finished block (mostly because two of the legs are closer to correct and/or I stared at this quilt for too long)! :D).
  • I cut appropriately sized squares & rectangles out of the fabric first and then cut pieces out using the templates. I left the flat end of the blue parts a little long, so I would have extra room during the trimming process. Precutting the squares might not be as doable if you are fussy cutting, but if the print is centered in the square I think it should be fine.
  • EZ Quilting Extra Thick Template Plastic, a 18mm rotary blade, and cutting in stacks of four solved many of the problems I've previously had with trimming the template plastic.
  • I've been saying it for every quilt pattern lately, but for this one especially: ROTATING CUTTING MAT! I used it for cutting the pieces with the templates and trimming the blocks. It made everything so much easier. When trimming, the legs should hit the 45-degree lines.
  • I was really happy that I had no problems with my blocks laying flat. I used all of the best practices for curves, so any or all of these may have helped me avoid problems: (1) Starch! (2) Serious pinning. (3) Carefully pressing the seam and then pressing the whole block from the back (4) Sewing slowly. (5) Small stitch length (6) Sewing half of a curve at a time, from the center to the edge.
  • Instead of pinning the last 1/2" of the star legs, I glue basted. It helped me keep everything lined up in the end. 
  • When I finished all the blocks, I glue basted the blocks into rows. I spent a long time arranging the blocks and that step prevented any mix-ups.
  • I wish I had used techniques to reduce bulky seams. The block intersections had a lot going on!


The name was pieced using from blank pages... My First Alphabet (Limited Use License) pattern. Most of these quilts have been gifts, so I am only on 2 of 50 of the license. The name was long, so I flipped it vertically to take advantage of the length of the quilt.

I used Sax Plain White Newsprint for paper-piecing. It is so easy to work with! At Amazon.com it is currently $3.59 + $4.99 shipping for 500 pages which is a better price than paper specifically sold for paper-piecing, but it might be worth checking an office store nearby so you can avoid shipping costs.

Cloud dinosaurs? Yes please!


The blue print is Let's Pretend Cloud Pictures in Breeze by Sarah Jane, which is the cutest. I've gotten in the bad habit of finding a print I like and then trying to find it in the store. The print was harder to find than expected, especially in the Breeze colorway.

More information on the personalized baby quilt backings at this link.

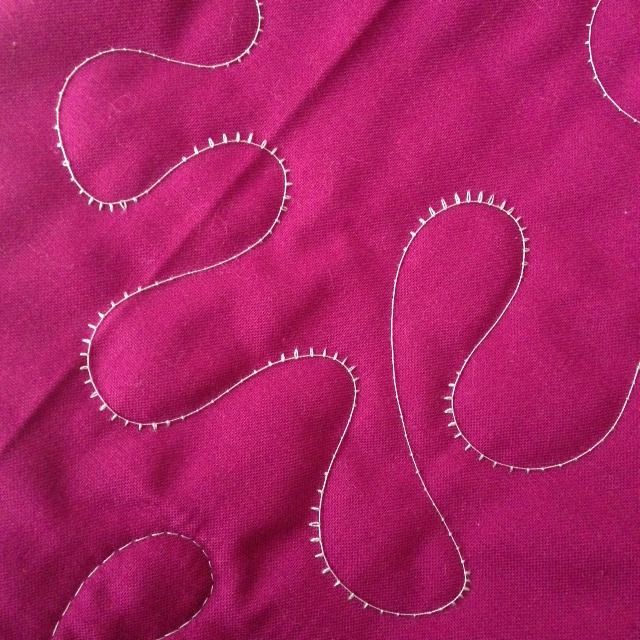
The stars weren't as uniform as they should've been, so I wanted to use an allover pattern. Straight lines were out, because I thought it would draw attention to any of the more unique stars! My thought process was: Star Gazer → Stars → Milky Way → Spiral. Spiral quilting adds such great texture and is really easy once you get started.

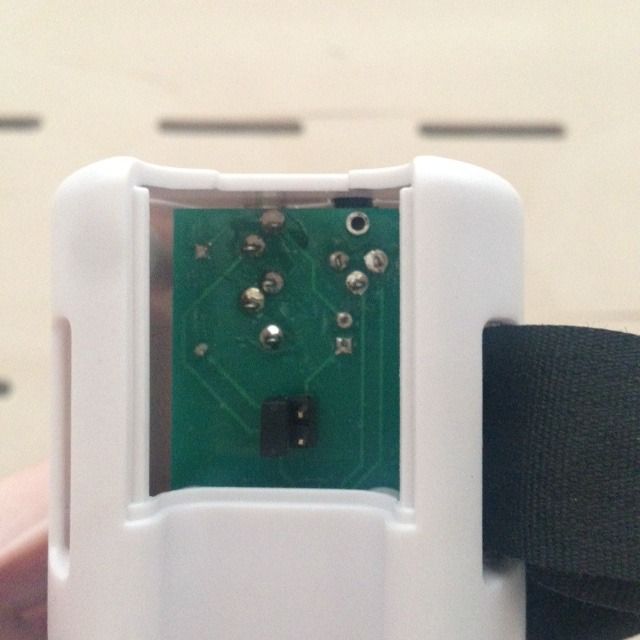
The spiral has 1" spacing between quilting lines. The Juki walking foot is 1/4" and I was not willing to spiral quilt in 1/4" increments! That is when I discovered one issue with the Juki walking foot; there is no place for a guide bar! Since I had a terrible time trying to use a paper clip as an impromptu guide bar during my last spiral quilting experience, this time I decided to glue (E6000) a .75" toothpick to my walking foot as a guide (NOTE: I let the glue set for 24 hours). Surprisingly, it worked! The toothpick gave me a single point to focus on and came off easily when I was finished.

Spiral quilting was much less frustrating this time! I have bigger harp space now, but I think the biggest difference was the needle down function. I am never buying a machine without needle down again! I also made it easy on myself and started the spiral in the center this time. I used a smaller stitch when starting the spiral. The first few rounds are the hard part, because the curves are tight. The smaller stitch length made it easier to slowly navigate those tight curves.

The top thread is Aurifil Light Blue Grey 50wt and it blended better than the light blue I used on my last quilt with this color scheme. I used Aurifil Aluminium for the bobbin thread. I chose something that was a little lighter than the Light Blue Grey for the back, so the color of the thread wouldn't overpower the name.

Red and white strips again! The fabric is Michael Miller Clown Stripe in Red.

I looked at my finished quilt page and realized that my last seven quilts were baby quilts. I desperately need to make an adult quilt and/or a quilt for myself! I have a couple more baby quilts to make, but after that I am going to get serious about finishing some of my larger quilts.

I will be linking up with Finish it Up Friday at Crazy Mom Quilts, Fabric Frenzy Friday at Fort Worth Fabric StudioThank Goodness It's Finished Friday (which is being hosted at -Things I Make this week),  Show off Saturday at the Sew Can She blog and Sew Cute Tuesday @ Blossom Heart Quilts

Thursday, March 12, 2015

My Thoughts on Short Arm Quilting: Jelly Roll Jam

36.5"x36.5" | Jelly Roll Jam | Cuzco Jelly Roll


The Jelly Roll Jam is so easy to make and would be great for a quick baby shower gift, especially if there are twins involved! The pattern gives you two quilts, so with materials bought on sale it was a relatively inexpensive gift to make. The pattern is available for free at Fat Quarter Shop's website. I decided to divide up my Cuzco jelly roll into purple/pink/white and blue/orange/yellow color groupings. The blue/orange/yellow one is my favorite, because it reminds me of a koi pond!

I made this quilt so I could practice my FMQ skills and it is the first quilt that I put on my Gracie Queen frame. It is always more fun to practice on an actual quilt and it is less upsetting to make a mistake on a quilt that doesn't require a huge time investment!


I sewed the leftover scraps together to create the backing strip. There were a few whole jelly roll strips left too, so that is what I used to surround the scrap strips. I also used three Kate Spain half yards and one solid half yard for the backings.


I cut rounded corners, because there are so many straight lines in this quilt. I chose binding colors that bring out the most calming parts of the quilt, which is important in such a print heavy quilt! I am guessing at the actual colors, but I used a fat quarter each of Quilter's Linen in Thistle and Tiny Diamonds in Teal.

Note on the Tiny Diamonds: I tend to stay way from checkered or gridded fabrics for bindings. Those patterns can give the illusion that the binding is twisted or bulging, if you don't pay careful attention to your cutting or if something about the print makes it difficult to cut in a way to avoid the distorted look. You can see this effect on my first Twister Quilt. The Tiny Diamonds print doesn't bother me in photos because it is tone-on-tone and reads like a solid, but it does bug me in person! Just something for me to remember in the future!


With this 36"x36" quilt, I think it took longer to load it into the frame than to quilt it! I used a large stipple, but it is a little hard to see. If you click on the images above, the quilting can be seen most clearly on the yellow and pink backing fabric.

There is a window seat behind the machine, which has been great for holding supplies.
My current quilting setup is a Juki TL2010q and a Gracie Queen Quilting Frame. I originally had my heart set on a Janome Horizon, but I since I had the space and I love making larger quilts I decided to buy a more basic machine + frame combination instead. Since I only finish a few quilts a year and quilting is just my hobby, I think this is currently the most appropriate setup for me...and the setup that was easiest to talk my husband into. ;D

I bought the frame and sewing machine at SewVacDirect in Bryan, TX. I was so excited when I picked a place to buy the machine and it turned out the physical location was only an hour drive away! The customer service is really great and responsive. When I finished setting up the leader cloths and had a practice quilt loaded, I pushed 'ON' button and...nothing! There was a problem with the Speed Control, the controller attached to the handle that takes the place of the foot. I called SewVacDirect and they were ready to ship me a new Speed Control immediately. I reached The Grace Company before the new one was shipped and it turned out that in the black cap on the circuit board was on the wrong set of pins.  So I moved the black cap over and it worked! I really appreciate the speedy response from both companies!

Some resources that have helped me a long the way:
Frame Quilting @ Piecemeal Quilts (post + comments)
Wenda Coburn: Confessions of a Short Arm Quilter + Online Store. I also bought her ebook Short Arm Quilting.
A New Look at Long Arm Quilting (Free Craftsy Class) - This class is on a long arm, but still helpful!
Gracie Queen Frame YouTube Video 
Fabri-Fast Fabric Installation Guide

Leader Cloths - There are pre-made leader cloths available, but I decided to make my own because of the inconsistent reviews on Amazon.com and the pre-made ones are fairly expensive. Ticking stripe was universally recommended, so I used Vertical Ticking Stripe Black/Ivory Fabric. It is 54" width so I only needed 3 yards, which I cut into three long pieces of varying heights (approx 10", 18",  24"). The ticking stripe is printed on a sturdy cotton duck and the straight lines are helpful! The instructions for making leader cloths are in the frame instruction manual. JustSewOlivia has a really helpful post with great pictures. I did not have to use velcro, because my cloths 'snap' in with plastic tubing.

I pin my quilt to the leader cloths with flat flower head pins.

Practice: My first practice piece was just a large generic purple solid top and a large generic purple solid back and white thread. The white thread on dark solid made it easier to catch and fix any beginner's mistakes quickly. It also helped me get a feel for the quilting movement, without having to worry about unpicking threads. I did use a seam ripper on the practice quilt or the Jelly Roll Jam quilts. It is not helpful for me to focus on perfection when learning. At this point, I am focusing on becoming comfortable with the machine, the frame and my technique.

Pros: • It makes quilting so much easier and faster! The carriage moves so smoothly and the quilting movement is much more natural for me. • Not having to baste is awesome! • I don't feel intimidated by my stack of large quilt tops anymore. The work area for the queen setup is 84". • There are upgrade options for the frame. The carriage will fit most machines with up to an 18” throat (foot pedal and power cord have to be separate). If I ever wanted to quilt larger quilts, there is a king expansion set available. • The Grace Company has many helpful YouTube videos. • I get less stressed out about mistakes, since I am further away from the quilt when quilting.

Cons: All these are relatively minor for me: • Lining up the quilt top with a pieced backing is slightly harder. It is easy to center the top and backing horizontally on the frame, but a bit harder vertically. I did pretty well with the baby quilts in this post, but one of quilt tops did end up an inch higher than I wanted. Of course, that is a huge deal to no one but me! • I have to add a few more extra inches to the backing than I did previously. • It is a little more challenging to fix mistakes, when you can't quickly rip the quilt away from the machine and head to the couch!

Limitations - The Grace Machine Quilting Frame is ideal for sewing machines with up to an 18" throat. My Juki-TL2010q has a 8.5" throat size (from needle to the inside of the machine). The biggest limitation is throat size.  Since the finished quilt is rolled onto the take-up rail inside the throat, the available quilting space becomes more limited as you work on the quilt. When choosing a quilting design, you really need to consider the space that will be available during the whole quilting process. Also, you don't want to accidentally bump into the back of the machine while quilting! I have been choosing a seam line as a "Do Not Pass" point.

From the Gracie Frame Machine Quilting System Manual: "With a sewing machine that has a 9" throat, you would be able to sew a pattern up to 7" for your first row of patterns prior to having rolled any fabric onto the take up rail. By the end of your quilt the largest pattern you can sew would be reduced to as little as 4" depending on the batting thickness and length of the quilt that is rolled on the Take-up Rail."  I have seen a few people mention that they will flip the large quilt halfway through and work in reverse, so at maximum only half of the quilt ends up in the throat.

Quilting issues I have had so far:
  1. When I was quilting on my practice quilt, I noticed that there were thread eyelashes all over the back! I tried so many things to fix it, but it ended up being the most simple thing. I had been forgetting to put the pressure foot down!
  2. I am having a little bit of problem with quilting on the edges, even while basting. Leah Day has several recommendations to avoid this issue and one is to make the border a little too large (so you can start your quilting an inch or so in) and trim down later. Another quilter recommended spraying a little fabric adhesive under the edges. I haven't tried either of these tips yet, but I will on on my next quilt.
  3. Lighting - While I had no difficulty when practicing on solids, I did have trouble seeing my quilting on the very busy Jelly Roll Jam quilts. I bought a LED lamp with a clamp at Lowe's and I will be experimenting with it and possibly other lighting options.
Things I will be looking into further:
  • I didn't even think about using rulers with this machine, but I discovered that I can! You just have to be mindful of the ruler size. Wenda Coburn has a list of rulers that are appropriate for a short-arm. I bought a ruler foot for my Juki, but it appears that you can also buy a teflon attachment to convert your regular quilting foot into a ruler foot.
  • I was under the impression that you had to have the Gracie King attachment to have a batting rail, but it appears that AllBrands has a batting rail for the Gracie Queen. Right now the extra batting just drapes on the floor, rather than being rolled up like the backing and quilt top.
  • The Gracie Laser for pattern tracing.
Overall, I have had a good experience so far! The pros outweigh the cons and I am more excited about the actual quilting now. I will probably add more information to this page in the future, as new things come up. If anyone has any frame quilting tips or suggestions, feel free to leave them in the comments!

I will be linking up with Fabric Frenzy Friday at Fort Worth Fabric StudioThank Goodness It's Finished Friday (which is being hosted at Quilt Matters this week),  Show off Saturday at the Sew Can She blog and Sew Cute Tuesday @ Blossom Heart Quilts! The Jelly Roll Jam quilts are one of the projects listed on my 2015 Q1 Finish Along list. The 2015 Finish Along is hosted by Adrianne @ On the Windy Side.

Thursday, March 5, 2015

Shylah's Quilt

This is a gift for my husband's coworker's new baby! (That is the story for most of my finishes lately!) The pattern I used has a really great, almost no waste technique for featuring prints. The main fabric featured is Everyday Party, which has many adorable large prints to feature.

Fussy Fairytales Pattern | 38.5"x51.5" | Everyday Party + Various Blenders + Bella Solids Porcelain


This quilt is made with Kate Conklin's Fussy Fairytales pattern.  Since I was making a baby quilt,  I made it 3x4 blocks instead of 4x5 blocks. I got it in my head that it was a 10" layer cake quilt (almost, but not quite), so my blocks are also a bit smaller at 8.5" x 9.5". Despite these sizing changes, the pieced border fit correctly without any adjustments other than the number of pieces.

Some things I learned while making this quilt:
  • Read though the instructions first, especially when it comes to the fussy cutting technique. It is almost no waste, if you read the instructions! 
  • Think about the sashing color,  Many of the best large prints in Everyday Party were the same color as the sashing and not very dense, so they would have blended too much when they became part of the outer frame of the block. When cutting the white prints, I cut in stacks of three instead of two and placed the white outer frame pieces in the scrap pile. 
  • A rotating cutting mat is very useful with this pattern. 
  • Instead of marking the fussy cutting window with pins, I used a temporary fabric marker. I didn't have any issues with fabric shifting.
  • The border was the most time consuming of this quilt. I learned to glue baste more effectively at QuiltCon and if I were to do a similar border in the future I would use that method. So instead of pinning little by little, I would glue baste each border strip in its entirety.
  • I haven't had a lot of trouble with borders in the past, but pieced borders are a little more complicated! Make sure the borders fit exactly. I fudged the slightly too short the top border a little bit and I really regretted it. If I had figured out where the seam allowance problem was and fixed it, I would have saved myself a lot of quilting stress.


I used my typical baby backing "template" as detailed at this link.

I absolutely adore the teal print! I went on a little bit of a journey for the half yard at the bottom. I was looking for:
  • Something in a local quilt shop, so I could get started immediately.
  • Small print, but not tiny.
  • Pink, but not too pink; probably more on the side of salmon in color.
  • Sweet print with a vintage charm that fit in with the rest of the fabric.
  • Fabric repeat that didn't look too gridded when used in a large piece.
Needless to say, I really didn't find what I was looking for (but I did come back with a few things that I did not need!). In the end, I settled on a heart print I already had in my stash. It is slightly more "princess pink" than I wanted, but the heart print fits in with the sweetness of the main prints.


A simple 6.5" diamond grid, using the main block corners as my guide. I decided to not try this one out on the frame, because I am very picky about the backing alignment on the baby quilts.


clearly have an addiction to red/white bias stripe! The binding on this quilt is Timeless Treasures Bias Stripe in Red. 


This is the first situation where I actually favor the pillow over the quilt! I think it turned out so adorable! This 16"x16" pillow is based on Jodi Nelson's Pinwheel Baby Quilt pattern from Moda Bake Shop. I reduced the pinwheels down to 4" finished. I added the extra teal border, because it really softens the brightness of the pink and red. I would love to make the entire quilt one day!

Now that this quilt is finished, I will be focusing on my Finish Along List. Better late than never! Today and tomorrow I will be working on the binding for the Jelly Roll Jam, the binding for the Fat Quarter Shop Designer of the Month quilt and the backing for the equilateral triangle quilt. 

I will be linking up with Fabric Frenzy Friday at Fort Worth Fabric StudioThank Goodness It's Finished Friday (which is being hosted at Quokka Quilts this week),  Show off Saturday at the Sew Can She blog and Sew Cute Tuesday @ Blossom Heart Quilts!

Copyright © From Pixels to Patchwork 2012. All text and images on this blog are property of From Pixels to Patchwork unless otherwise noted. If you link or share anything from this site, please credit me. Thank you!